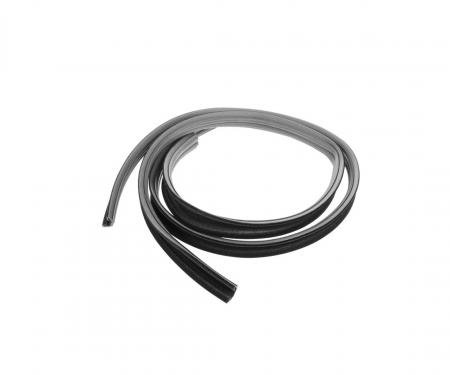
This two-piece top/back glass run channel kit fits 1962–1967 Chevrolet Chevy II 2- and 4-door sedans and restores the correct window sealing and guidance for the rear/top glass. Designed to replace worn or damaged factory channels, the parts secure the glass, reduce wind noise and water intrusion, and help maintain proper window alignment. Constructed from a weather-resistant rubber compound with corrosion-resistant reinforcement, the kit delivers durable, reliable performance and a near-original fit for restoration or maintenance projects. Easy to handle and straightforward to install, it’s ideal for restoring interior trim fit and long-term sealing integrity.
Features:
- Fits 1962–1967 Chevrolet Chevy II 2-door and 4-door sedans (top/back glass run channels, left and right).
- Two-piece kit includes left and right channels to restore proper glass guidance and sealing.
- Made from a weather-resistant rubber compound with corrosion-resistant reinforcement for long service life.
- Helps reduce wind noise, prevent water intrusion, and protect glass edges from wear.
- Direct replacement designed to closely match original dimensions and mounting points for accurate restoration.
- Simple installation with common hand tools; suitable for DIY repairs or professional restoration.
Installation / Application:
- Difficulty: 3/5
- Estimated time: 1–2 hours
Instructions:
- Prepare the vehicle: park on level ground, disconnect the battery if needed, and open rear door or access panel to reach the glass channel area.
- Remove interior trim and any window felt or retainers blocking access to the existing run channels using a trim tool and screwdriver; carefully set fasteners and trim aside.
- Lower or carefully support and, if necessary, remove the glass to gain clear access to the run channel according to vehicle-specific procedures (some installations allow channel replacement without full glass removal).
- Remove the old run channels by loosening any retainers, clips, or screws and gently prying the channel out of the window frame. Take care not to damage the glass or surrounding trim.
- Clean the channel mounting area thoroughly with a rag and a mild cleaner, removing old adhesive, dirt, and corrosion so the new channels seat properly.
- Test-fit each new channel (left and right) to ensure correct orientation and fit. Trim or adjust only if absolutely necessary following factory dimensions.
- Apply a light lubricant such as soapy water or silicone spray to the new channel lips to ease installation; if recommended by your vehicle restoration practices, apply a small amount of weatherstrip adhesive to secure the channel ends.
- Install the new channels by sliding or pressing them into the frame, aligning with original mounting points and engaging any clips or retainers. Ensure the channel seats fully along the entire length.
- Reinstall the glass, verifying smooth movement and correct seating in the new channels. Adjust window alignment as needed to eliminate gaps or binding.
- Reinstall interior trim, fasteners, and any felt or retainers removed earlier. Clean the glass and surrounding areas, then test-drive to confirm reduced wind noise and no water intrusion.
About Precision Replacement Parts
Since 1986 Precision Replacement Parts has been a trusted name in the Automotive Glass Industry.
Our knowledge and experience in manufacturing millions of extruded and molded EPDM Rubber, PVC and HDPE based plastics, and various stamped and extruded metal products for the classic and late model industries has allowed Precision to expand our services into multiple product markets.
Along with our own USA based production facility, Precision also partners with 25 different manufactures worldwide with a reputation as a global leader supplying OEM and replacement products to a number of different industries. Our partnerships along with our own in-house manufacturing and fabrication capability gives Precision a unique position in helping to meet the expanding needs of customers everywhere, providing them with a sustained competitive advantage.

Vehicle Fitment:
The Vehicle Fitment Guide is to be used as a general reference. The data has been provided by our suppliers and manufacturers and may contain errors or incorrect data. Always refer to a professional to verify correct fitment for your vehicle.
| Make |
Model |
Years |
Fitment Notes |
| Chevrolet |
Chevy II |
1962 - 1967 |
Sedan |