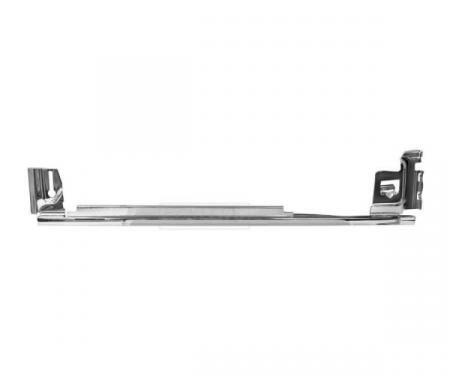
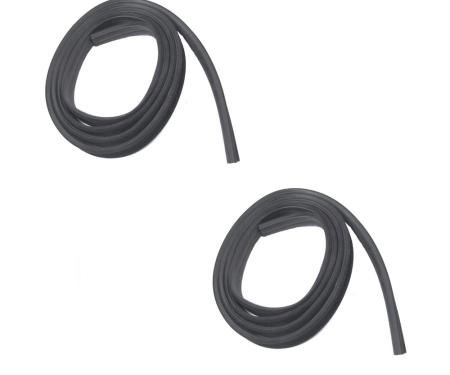
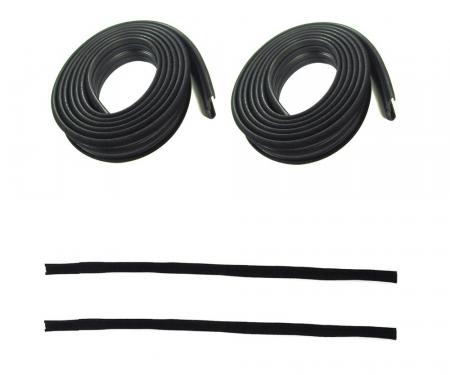
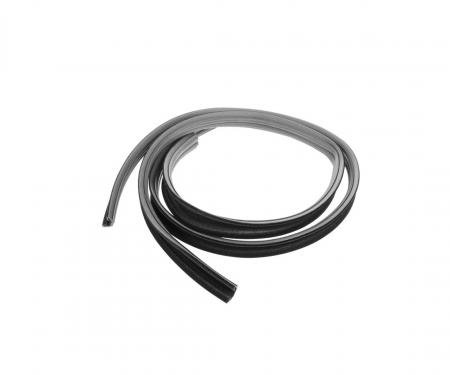
A direct-fit top/back glass run channel engineered for 1962-1967 Chevrolet Chevy II 2- and 4-door sedans. This channel seals and guides the top and rear edge of the side glass, protecting the glass edge, reducing wind noise and vibration, and preventing water intrusion. Made from a durable rubber compound with a reinforced carrier for correct alignment, it restores proper window operation and OEM-style weather sealing for classic Chevy II restorations and maintenance. Easy to install and built to resist UV and ozone for long-term reliability.
Features:
- Fits 1962-1967 Chevrolet Chevy II 2-door and 4-door sedans (top/back side glass run channel, left or right hand).
- Premium rubber compound with reinforced carrier for accurate glass guidance and long life.
- Seals and cushions the glass edge to prevent leaks, wind noise, and vibration.
- Direct replacement that restores OEM fit and window operation on restored or maintained vehicles.
- UV- and ozone-resistant material for improved durability and weather resistance.
- Sold as left or right side channel; designed for top/back (rear) section of side glass.
Installation / Application:
- Difficulty: 2/5
- Estimated time: 45-60 minutes per side
Instructions:
- Park vehicle on level ground, disconnect battery if desired, and lower the side glass slightly to gain access to the run channel ends.
- Remove interior door or quarter panel trim as needed to access the top/back glass edge and channel retainers (use trim tool to avoid damage).
- Carefully detach any retainers, clips, or screws holding the old run channel; note hardware locations for reassembly.
- Pull out the old channel from the top/back glass edge. Use a utility knife to cut through any bonded or deteriorated rubber and vacuum out debris.
- Thoroughly clean the glass edge and channel mounting area with a lint-free cloth and mild cleaner; remove old adhesive or residue.
- Test-fit the new run channel on the glass to confirm orientation (left vs right) and fit. Trim excess if necessary following the original profile.
- Apply a light coating of soapy water or silicone lubricant to the channel to ease installation, then slide the new channel into place along the glass edge and into the mounting groove.
- Reinstall any retainers, clips, and trim in the reverse order of removal, making sure the channel seats evenly and the glass moves smoothly.
- Raise and lower the window several times to check alignment, operation, and that there are no binding points. Adjust as needed.
- Perform a water/leak check and final visual inspection. Reinstall any interior panels and clean the glass and surrounding area.
About Precision Replacement Parts
Since 1986 Precision Replacement Parts has been a trusted name in the Automotive Glass Industry.
Our knowledge and experience in manufacturing millions of extruded and molded EPDM Rubber, PVC and HDPE based plastics, and various stamped and extruded metal products for the classic and late model industries has allowed Precision to expand our services into multiple product markets.
Along with our own USA based production facility, Precision also partners with 25 different manufactures worldwide with a reputation as a global leader supplying OEM and replacement products to a number of different industries. Our partnerships along with our own in-house manufacturing and fabrication capability gives Precision a unique position in helping to meet the expanding needs of customers everywhere, providing them with a sustained competitive advantage.

Vehicle Fitment:
The Vehicle Fitment Guide is to be used as a general reference. The data has been provided by our suppliers and manufacturers and may contain errors or incorrect data. Always refer to a professional to verify correct fitment for your vehicle.
| Make |
Model |
Years |
Fitment Notes |
| Chevrolet |
Chevy II |
1962 - 1967 |
Sedan |